Get Started in 2 Minutes with Bonboarding
This quick guide is designed to get you started with your first product tour.
What to expect?
In just a couple of minutes, you'll learn how to create an onboarding flow for your new end-users, enhancing their journey within your digital product.
Step 1: Install the Bonboarding Browser Extension
Before you dive into creating your product tour, you'll need our handy browser extension. This powerful tool allows you to create and edit product tours seamlessly, even before integrating the Bonboarding script into your website.


You can download the Bonboarding Studio
browser extension for your browser of choice.
Step 2: Create a New Flow
Once the extension is up and running, it's time to create your first flow. This will open a new browser tab, targeting the domain you specified during sign-up.
You can update your domains anytime on the Integration page.
Step 3: Add Steps to Your Flow
Your flow can have multiple steps, including pop-ups and highlights. Here's how to add them:
- Popups: Use these to convey key information or call-to-actions.
- Highlighting your UI elements: Draw attention to specific elements on your page.
We created a 4-minute video to show you how to create your first flow.
Step 4: Customize the Style
Our StyleSync algorithm automatically guesses your page’s colors and fonts for a seamless design integration.
However, you might want to tweak the styles to your liking. Here’s how:
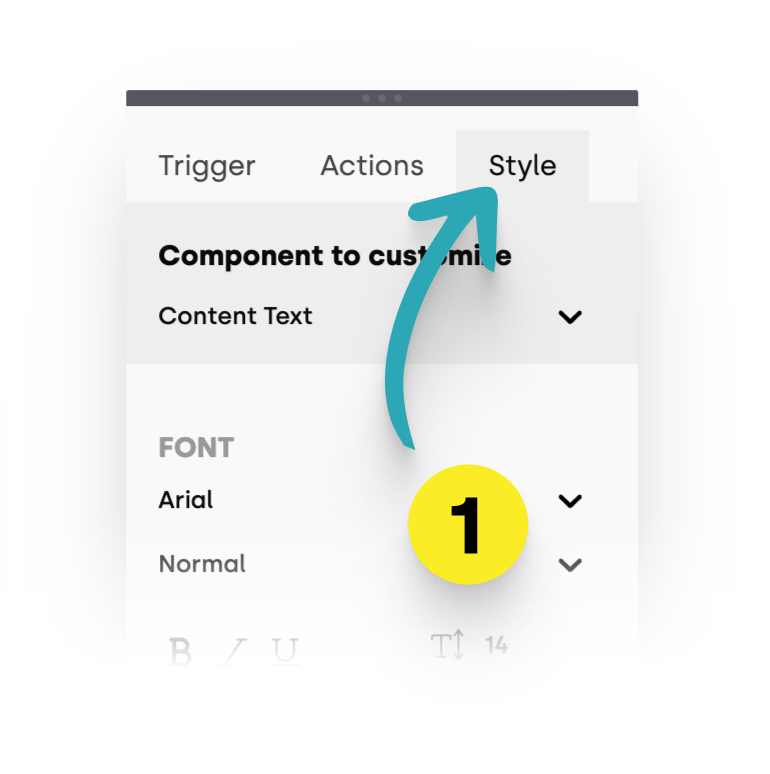
1. Access Style Settings: In the properties panel, go to the 'Style' tab.
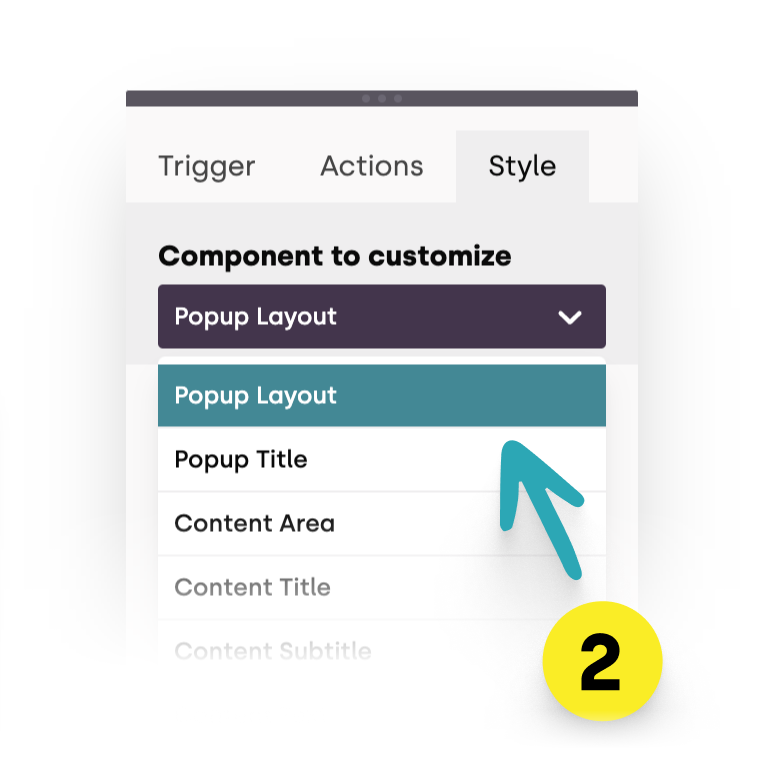
2. Choose the Component to Edit: Use the dropdown to select which element you want to customize.
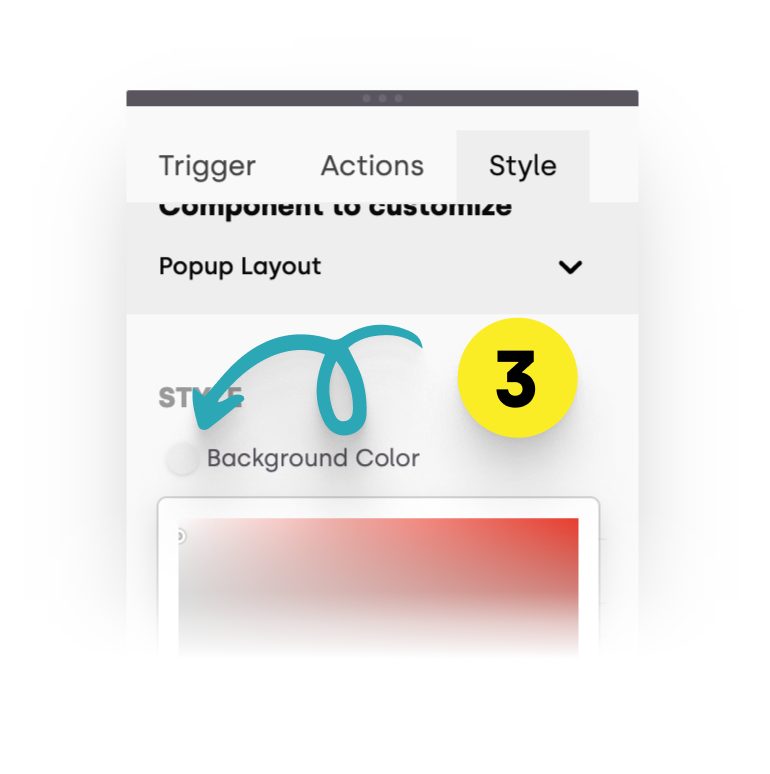
3. Adjust Anything: Change colors, fonts, and other elements to match your brand.
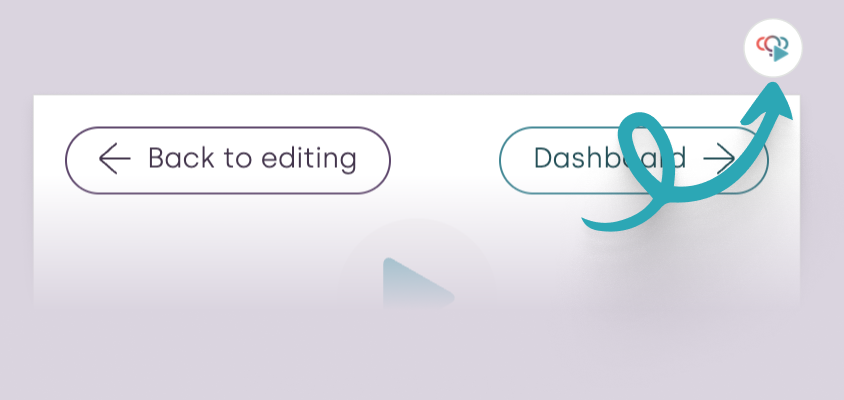
Step 5: Preview Your Flow
Before going live, make sure to preview your flow:
- Click on Preview: Use the 'Preview' button
 to launch your flow in preview mode.
 - Test the Experience: Navigate through the flow as your users would, making adjustments as needed.
While in "preview" mode, the icon will be ![]() and the popup provides preview-specific options.
and the popup provides preview-specific options.
Step 6: Integrate the Bonboarding Script
For now, the product tour you created is only visible to you - through the extension.
In order to appear to end-users, integrate the Bonboarding script into your web app:
- Access Integration Code: On the Bonboarding dashboard, navigate to the Integration page.
- Copy Script: Copy the Bonboarding script, (the one that looks just like this):
<script data-bb-key="12cd567hjk" src="https://go.bonboarding.com"></script>
Don't worry, your data-bb-key will be different.
- Inject into Website: Paste the script into your website’s HTML, somewhere in the
<head>tag.
This is the simplest way of integrating the Bonboarding script to your web app.
But it's likely that you'll want to pass some data about your users.
For more advanced options, platform specific examples, or how to pass data about your users, check out our Integration Guide.
Step 7: Activate Your Flow
The final step is to activate your flow:
Go Live: Return to the Bonboarding dashboard's Flows page and click on the three dots
 next to your new flow. Choose "Activate" from the dropdown.
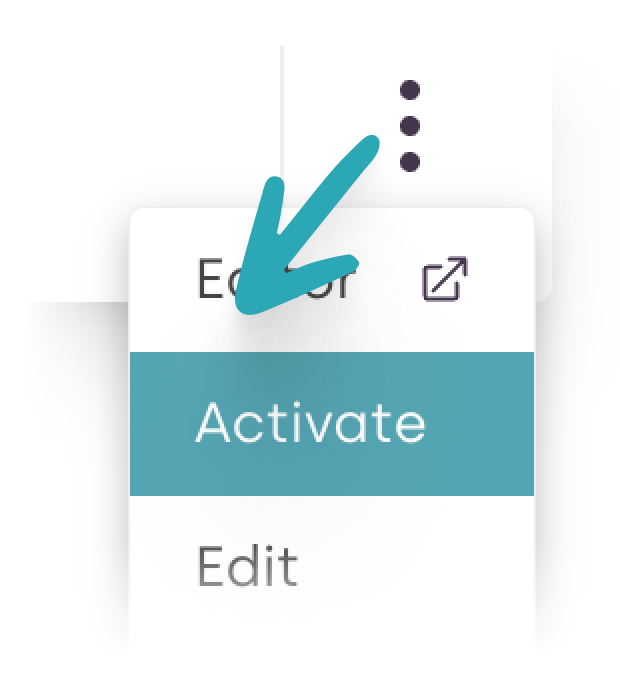
Monitor Engagement: Watch how users interact with your new onboarding experience and make improvements as needed.
Congratulations! 🎉
You've successfully set up your first product tour with Bonboarding.
But there's more to explore.